This guide explains the steps required to activate a new or a replaced C100+ device (for info on how to tell the difference between devices, check out WestPay terminals).
When the terminal is started for the first time (after replacement or during new installation), it asks for some configuration settings. The steps below are only required once per terminal installation. If the terminal, for some reason, is replaced in the future, these steps must be applied again.
Prep work
Make sure you have the following:
-
Receipt paper: Make sure the size matches.
-
Terminal ID: Trivec Support will provide this info.
-
Pay@Table Server IP: Trivec Support will provide this info.
-
Pay@Table server IP address: Trivec Support will provide this info.
-
Static IP address, Gateway and Network prefix length: These settings will be used to by the terminal, your IT/Network-administrator should provide this info.
-
Wi-Fi (SSID) name and password: Your IT/Network administrator should provide this info.
-
A daily code (Only needed in case the device prompts for it): Trivec Support will provide this info.
Setting up the device
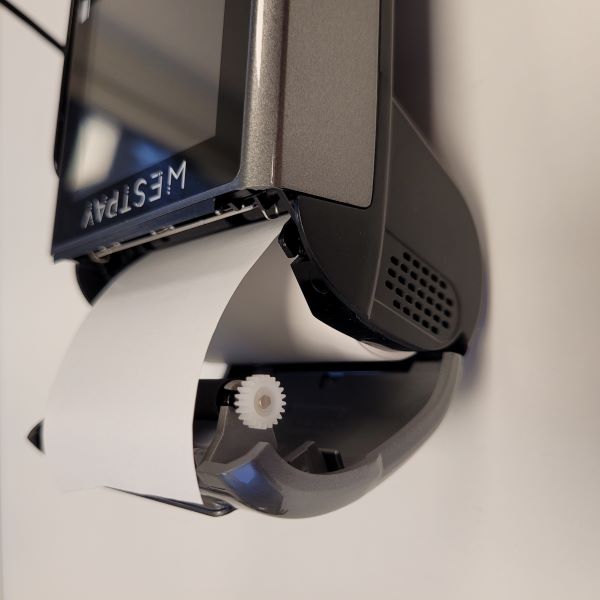
- Insert the receipt paper into the device. Make sure it's pointing the right way:
|
 |
- Start the device by holding down the grey Power button until the device screen turns on. This can take 8-10 seconds.
- The payment application starts and asks for the Terminal ID:
|
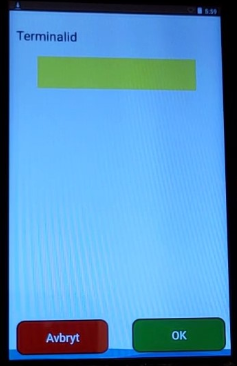 |
- Enter the Terminal ID by using the device keypad (Terminal ID number is provided by Trivec Support).
- Press the yellow device button to delete an entered value.
- Double-check that Terminal ID is correct.
- Save the settings by pressing OK or the green button on the screen.
- On the next screen you will be asked to enter Pay@Table server IP address and Port:
|
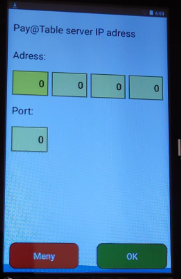 |
- Enter the Address and Port by using the device keypad.
- Save the settings by pressing OK or the green button on the screen.
If the terminal displays a "Paper not filled" error, make sure the receipt paper is inserted correctly and restart the device by holding down the grey button and selecting Reboot on the touchscreen.
Activating ECR
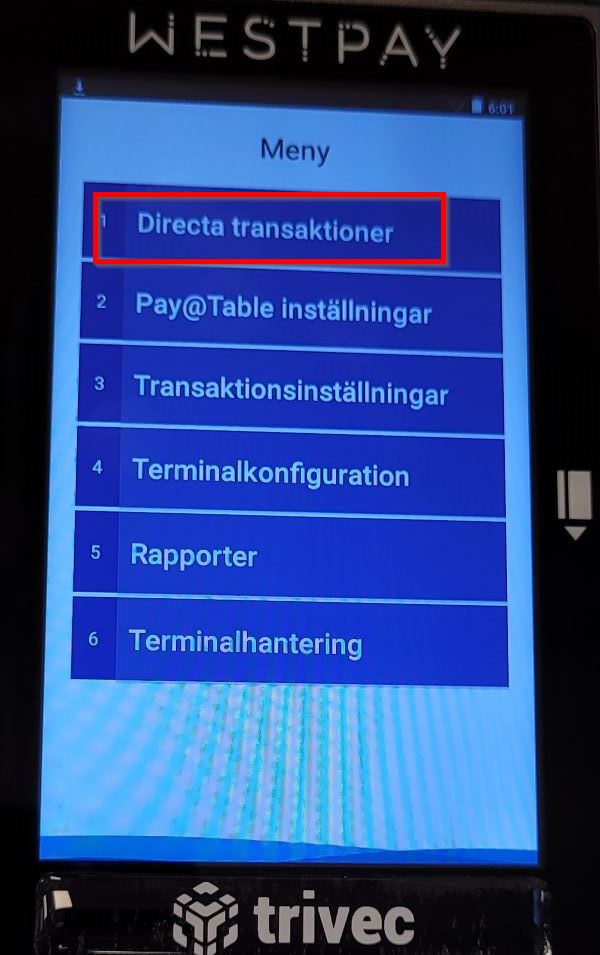
- When the device has started up again, select Meny on the screen.
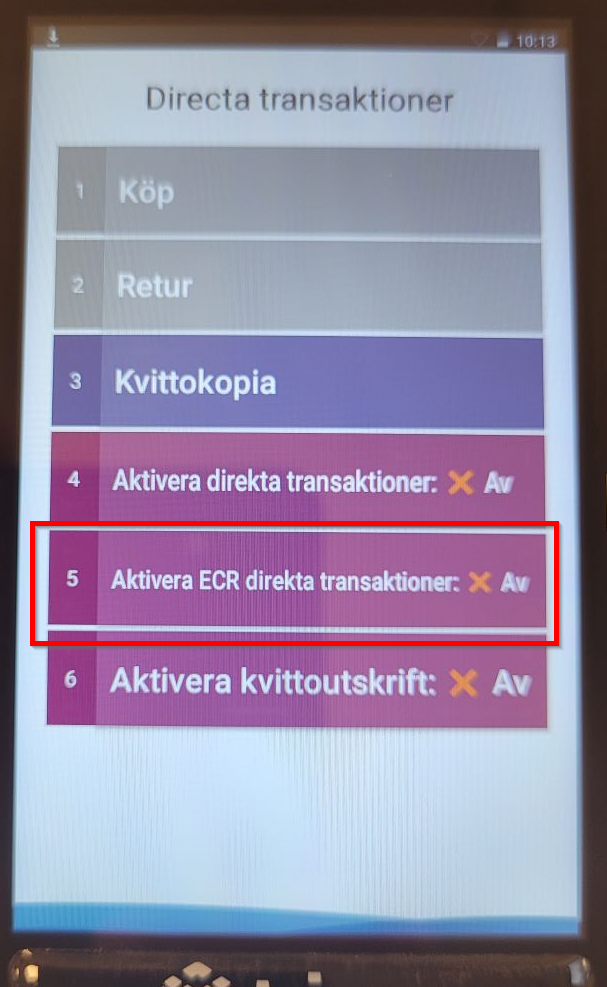
- Select Directa transaktioner on the screen:
|
 |
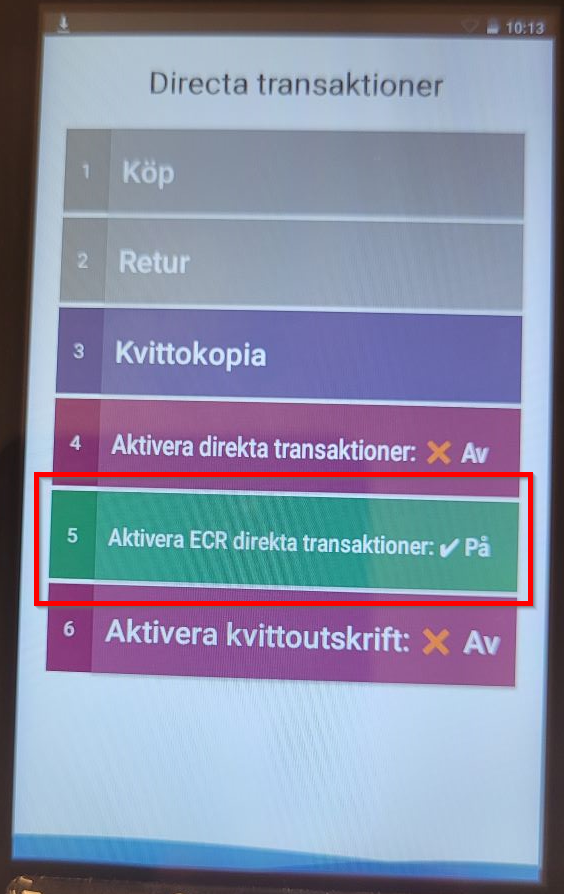
- Select 4 - Aktivera ECR direkta transaktioner so it color changes to green and status changes to På:
|
 |
- If requested to enter password, enter the daily WestPay password (provided by Trivec Support).
|
|
- Once completed, Aktivera ECR direkta transaktioner will change its color to green with a checkmark:
|
 |
- Press the red button once to get back to Meny.
Connecting to WiFi
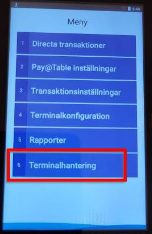
- Select 6 - Terminalhantering on the screen:
|
 |
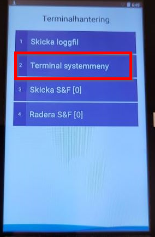
- Select 2 - Terminal systemmeny:
|
 |
-
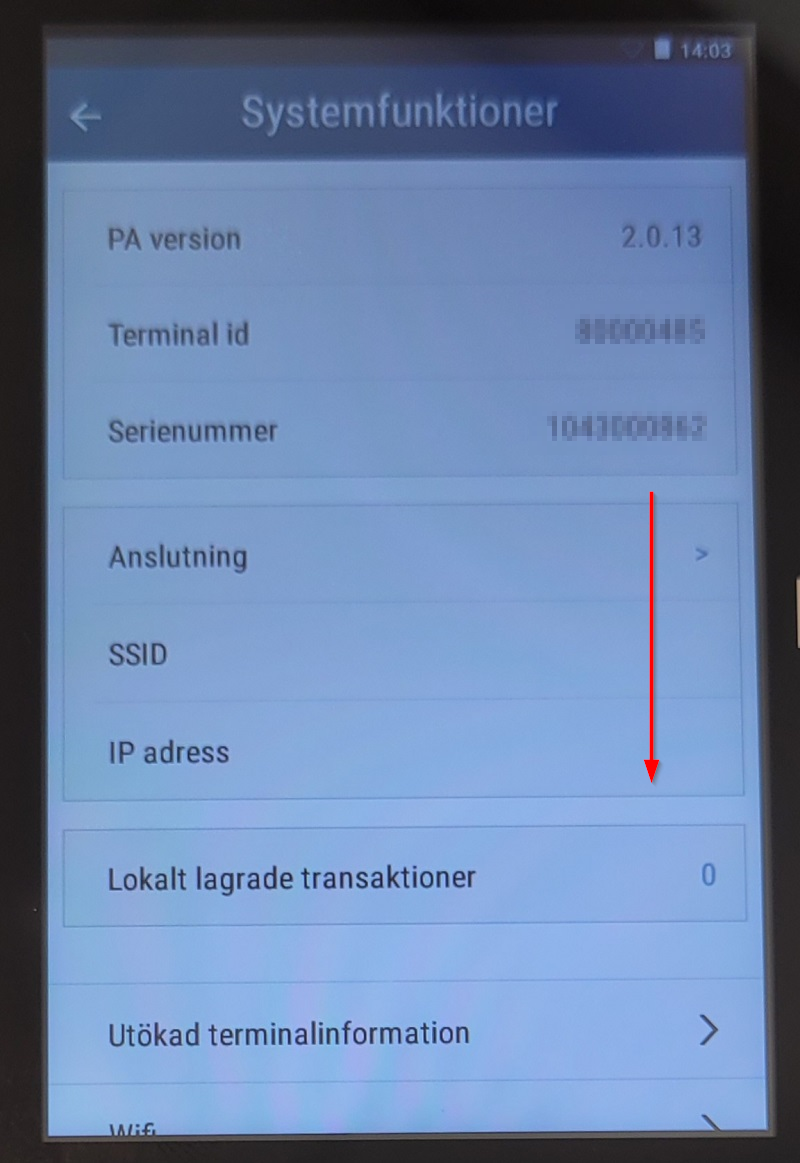
(If using version 2_0_13) Swipe down on the Systemfunktioner screen:
|
 |
-
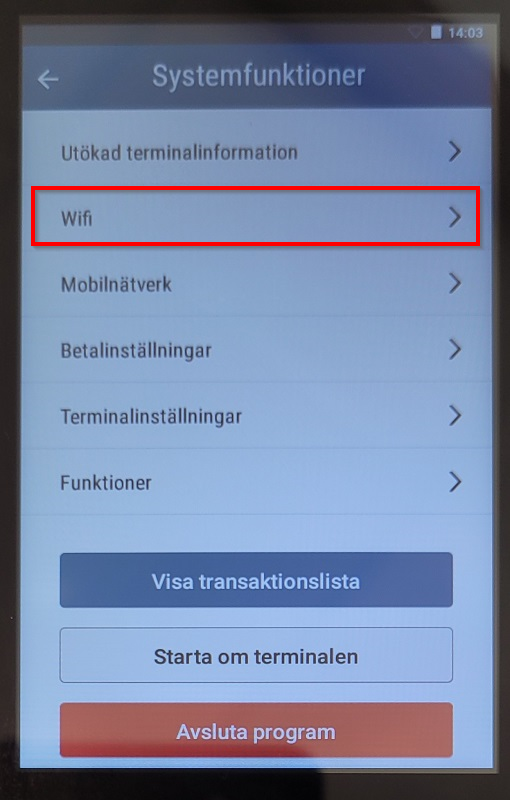
(If using version 2_0_13) Select Wifi:
|
 |
-
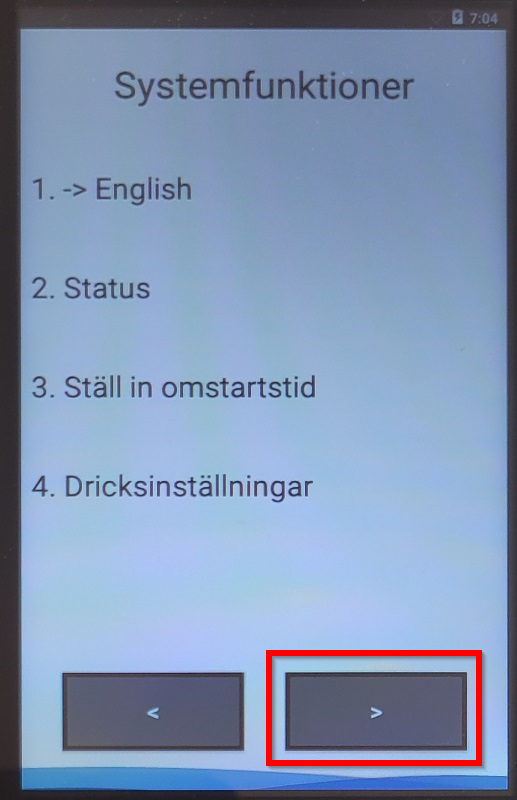
(If using version 2_0_11_4) Select the right arrow to navigate the menu:
|
 |
-
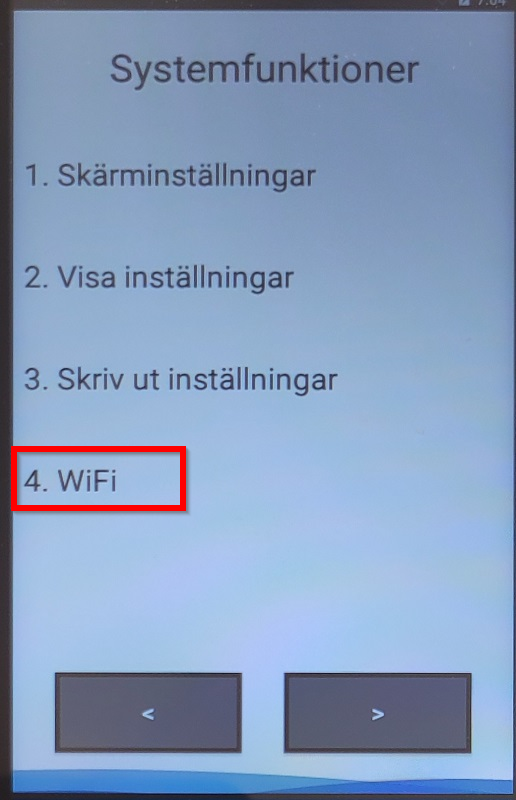
(If using version 2_0_11_4) Select 4. WiFi:
|
 |
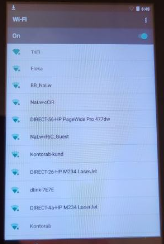
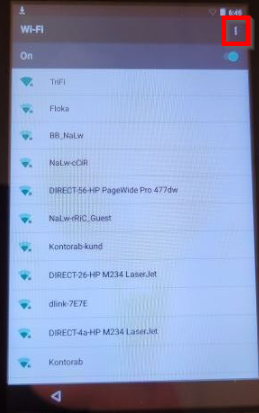
- Select the WiFi network you want to connect to on the screen:
|
 |
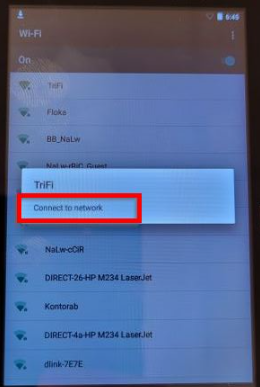
- Select Connect to network:
|
 |
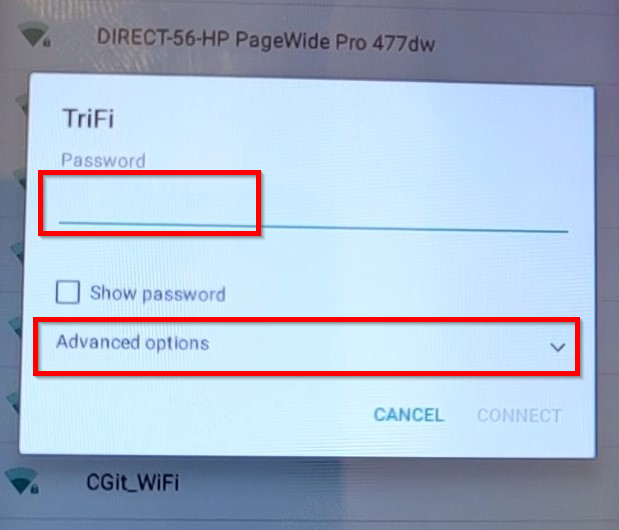
- Enter the WiFi password and select Advanced options to display more settings:
|
 |
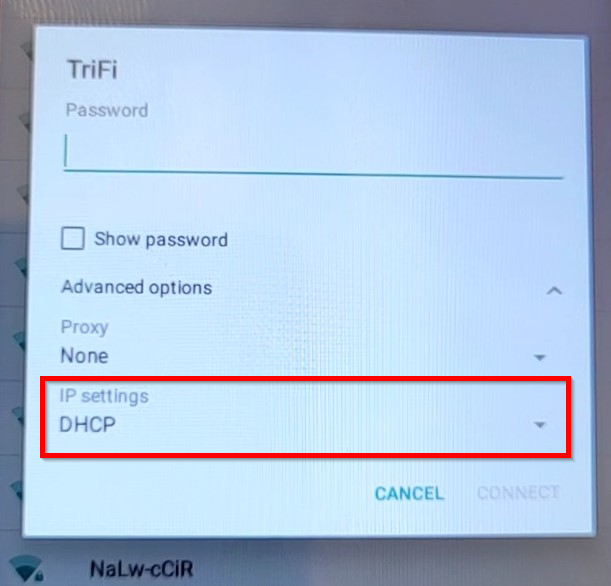
- Select IP settings and change from DHCP to Static:
|
 |
- Swipe up to reveal more settings and enter the IP address, Gateway and Network prefix length values that the device will use (IT/Network administrator should provide this info):
|
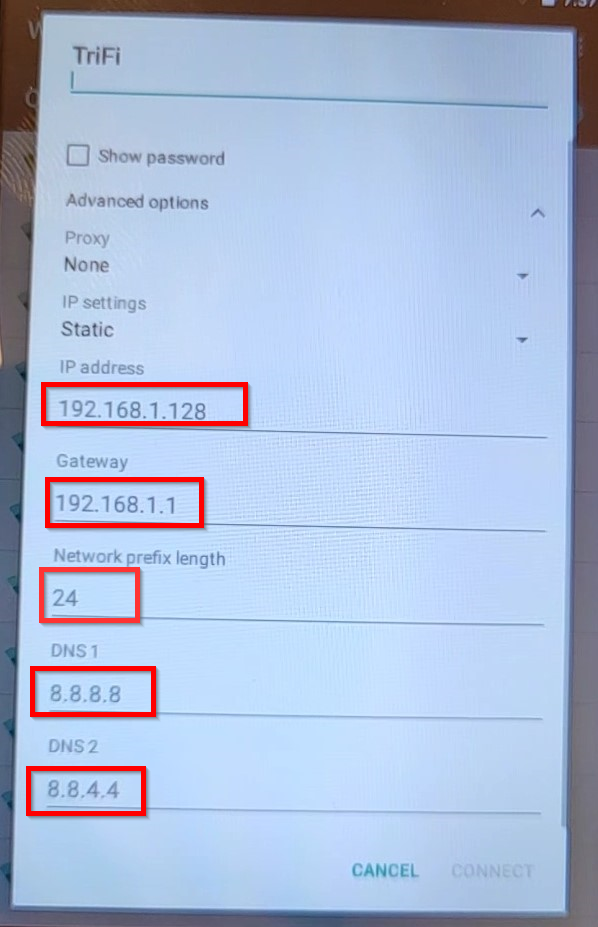 |
Gateway, Netmask, DNS1 and/or DNS2 may seem to be entered already with the correct data but in a light-grey color, meaning that this is just a suggestion from the manufacturer and the information still needs to be entered manually.
- Configure DNS1 to 8.8.8.8 and DNS2 to 8.8.4.4
- Don't change the Network prefix.
- Double-check that everything is correct and select Connect in the lower right corner of the screen.
Connecting to a hidden Wifi
- Process for connecting to a hidden WiFi is same as a regular WiFi, except that instead of selecting the network name on the list, you select the three dots in the upper right corner of the screen:
|
 |
- Enter WiFi network name (SSID), select Security and enter Password (IT/Network administrator should provide this info) and swipe up to reveal Advanced options:
|
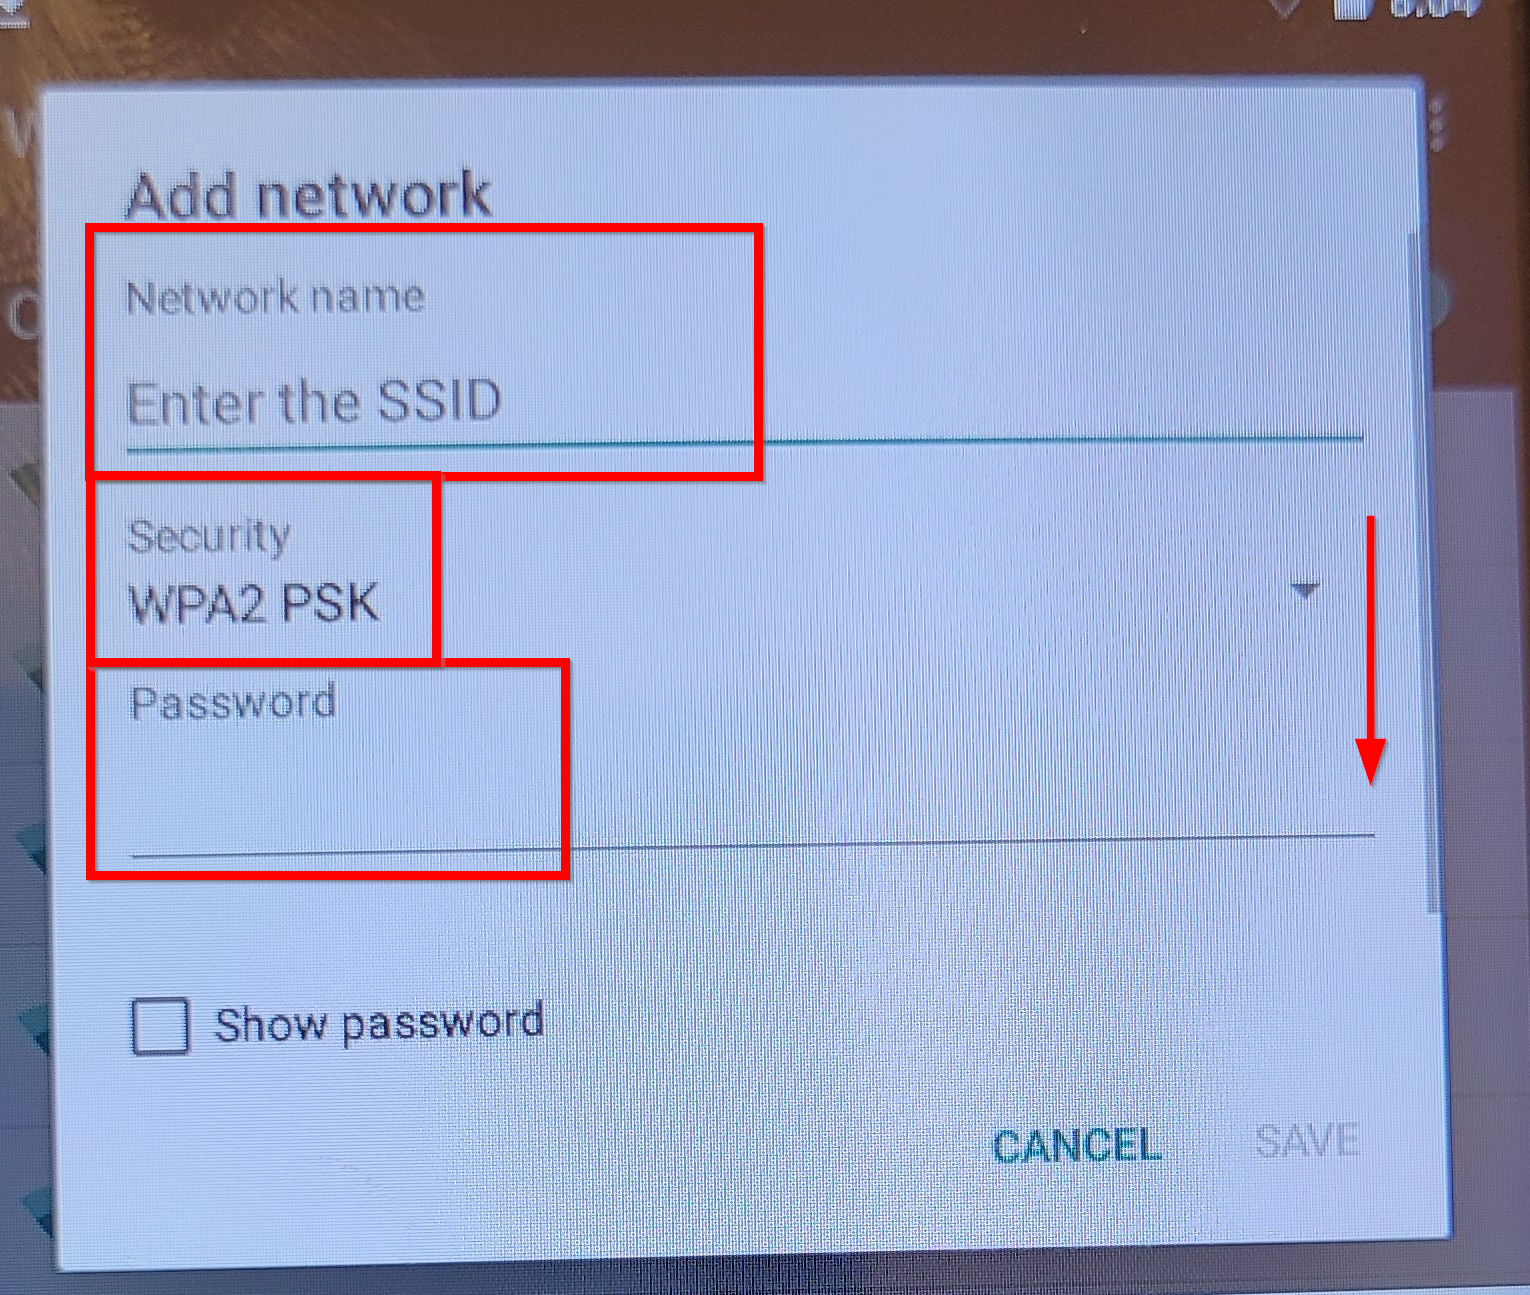 |
- Select Advanced options and follow the guide above to configure the rest of the settings.