This guide explains the steps required to activate a new or a replaced C10 device (for info on how to tell the difference between devices, check out WestPay terminals). This guide applies to device connected with a network cable (Ethernet). For devices connected with a USB, contact Trivec Support.
When the terminal is started for the first time (after replacement or during new installation), it asks for some configuration settings. The steps below are only required once per terminal installation. If the terminal, for some reason, is replaced in the future, these steps must be applied again.
Prep work
Make sure you have the following:
- Static IP address, Gateway, DNS1 & DNS2: These settings will be used by the terminal, your IT/Network-administrator should provide this info.
- A daily code (Only needed in case the device prompts for it): Trivec Support can provide this info.
Connecting the cables
|
 |
|
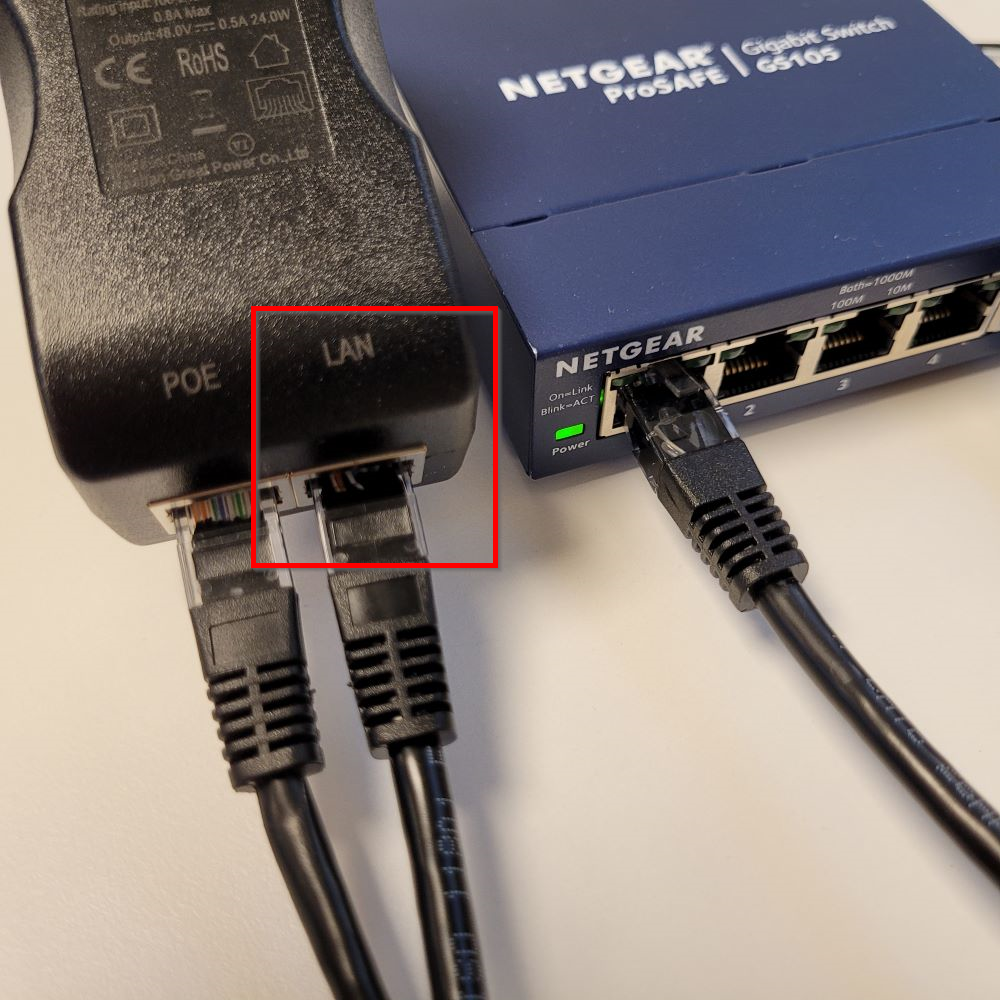 |
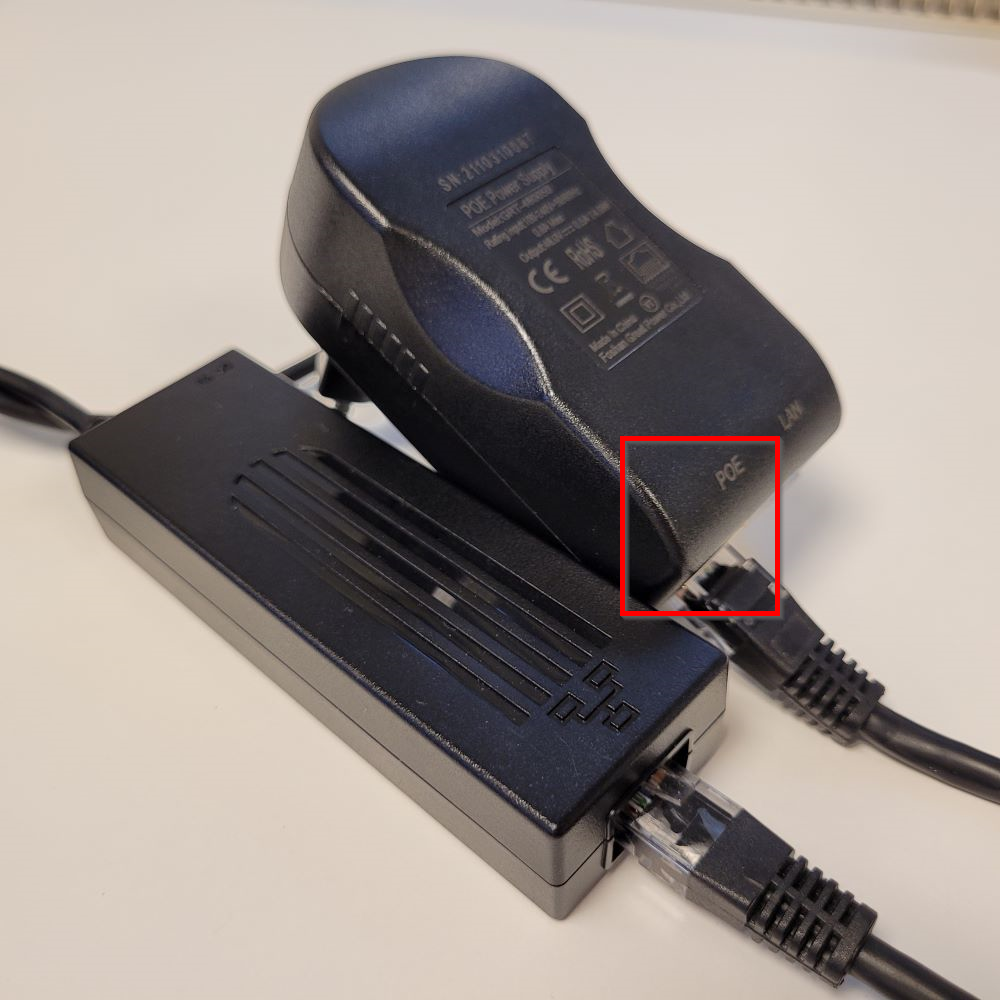
- Plug the PowerOnEthernet device into a power slot.
- The device will start booting, wait until it displays "Terminal Closed/Stängd".
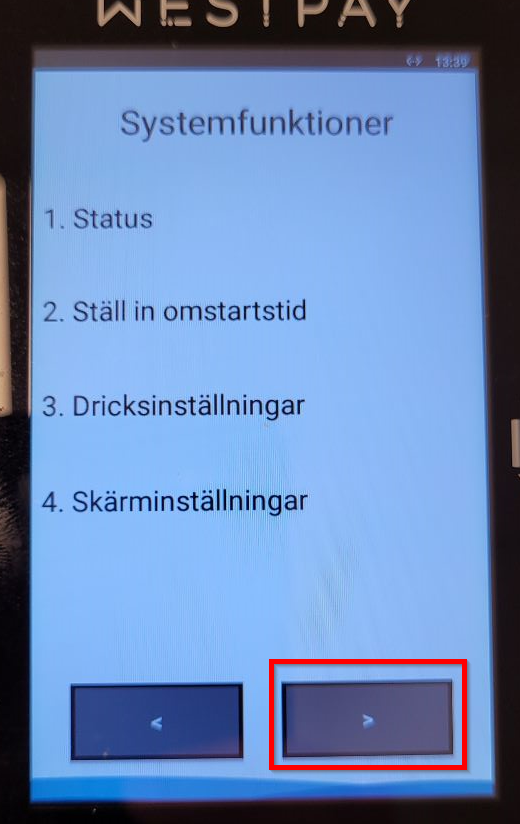
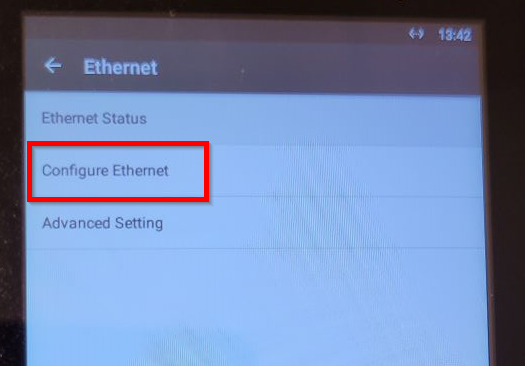
Connecting to network
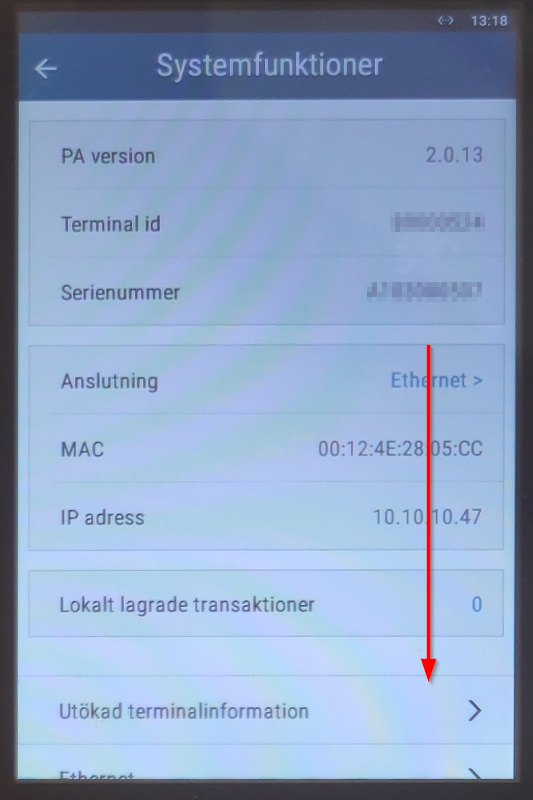
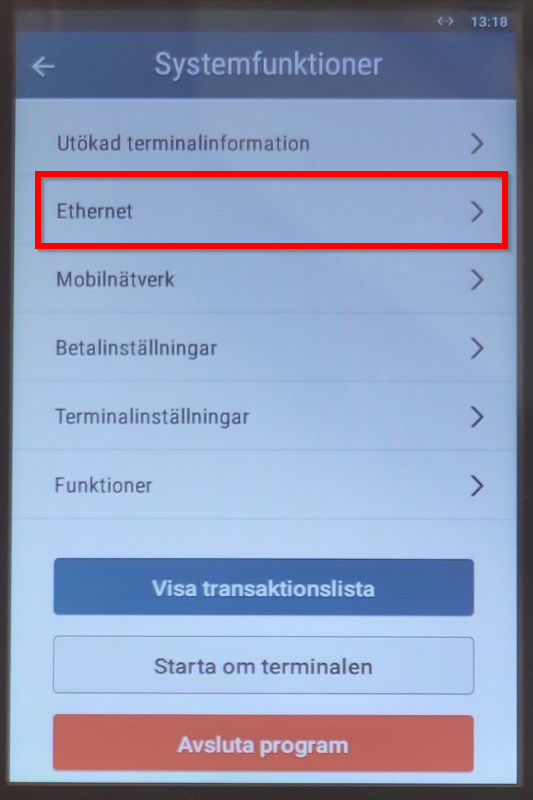
- With "Terminal Closed/Stängd" displayed on the screen, type 147369 on the keypad to enter the menu.
|
 |
|
 |
|
 |
|
 |
|
 |
|
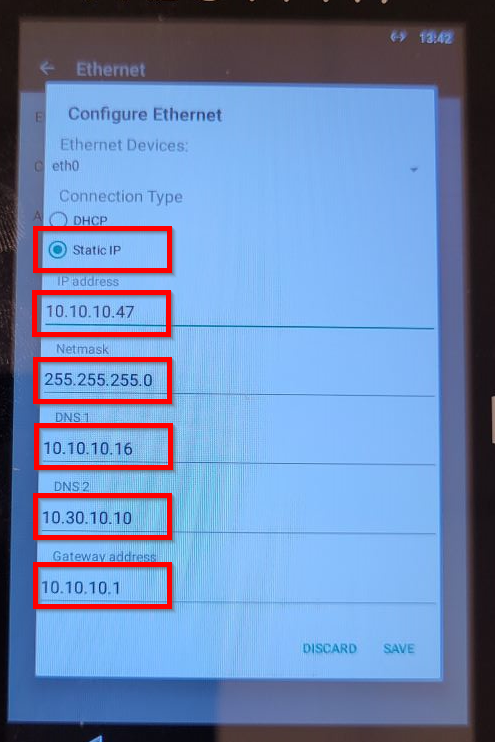 |
Gateway, Netmask, DNS1 and/or DNS2 may seem to be entered already with the correct data but in a light-grey color, meaning that this is just a suggestion from the manufacturer and the information still needs to be entered manually.
- Configure DNS1 to 8.8.8.8 and DNS2 to 8.8.4.4
- Double-check everything is correct and select Save.
Was this article helpful?
That’s Great!
Thank you for your feedback
Sorry! We couldn't be helpful
Thank you for your feedback
Feedback sent
We appreciate your effort and will try to fix the article