This guide explains how to use Event POS device. For an introduction to the device, check out About Event POS (Nordics). For info on troubleshooting the device, check out Troubleshooting Event POS (Nordics).
Disconnecting the blackbox (Sweden)
- If device is using a blackbox, it will be located under the rear interface lid:

- Unplug it, wait for a 10 seconds, and plug it in again.
Testing the printer
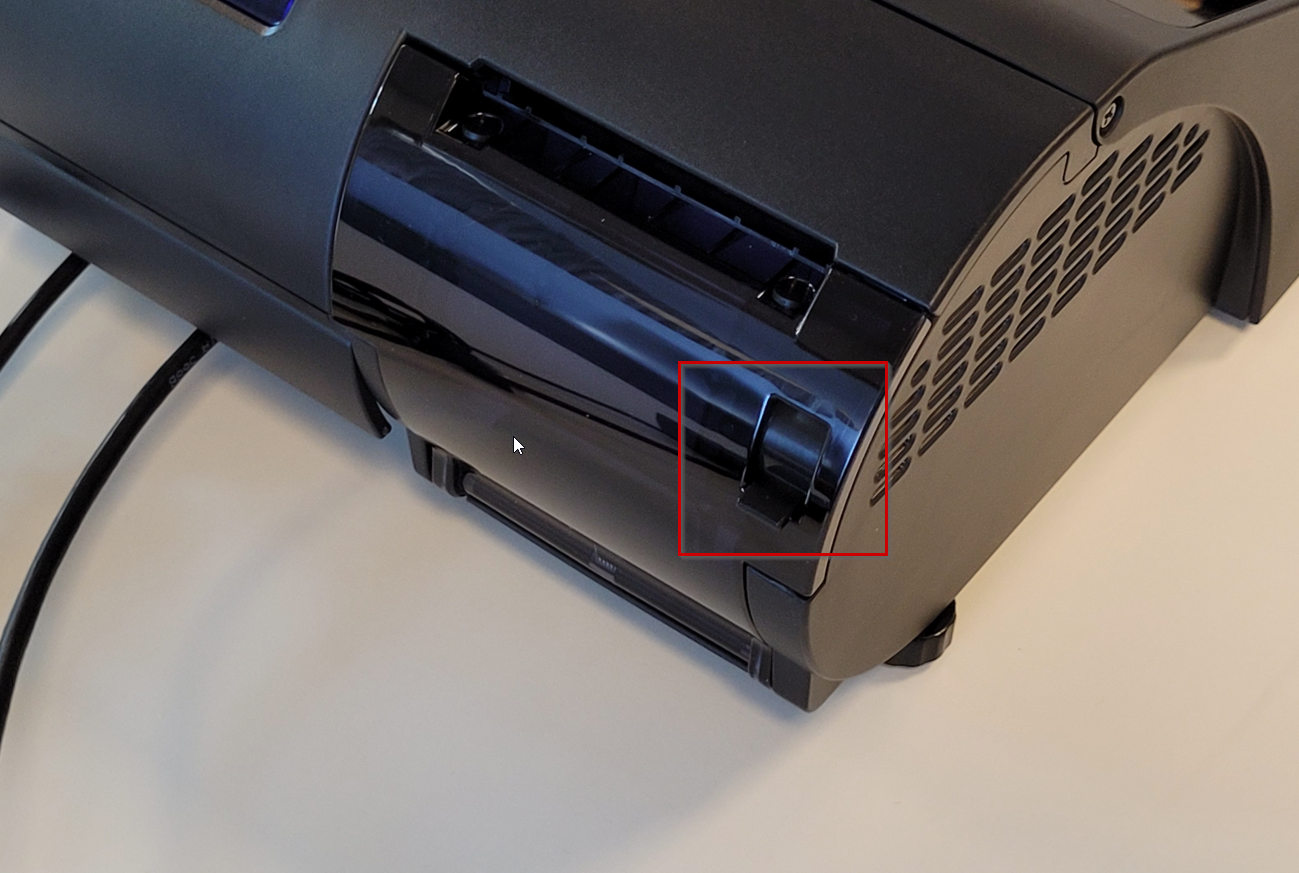
- Check that the paper is pointing i the right direction:
- Pull the small lever on the printer lid upwards to open the lid:
-
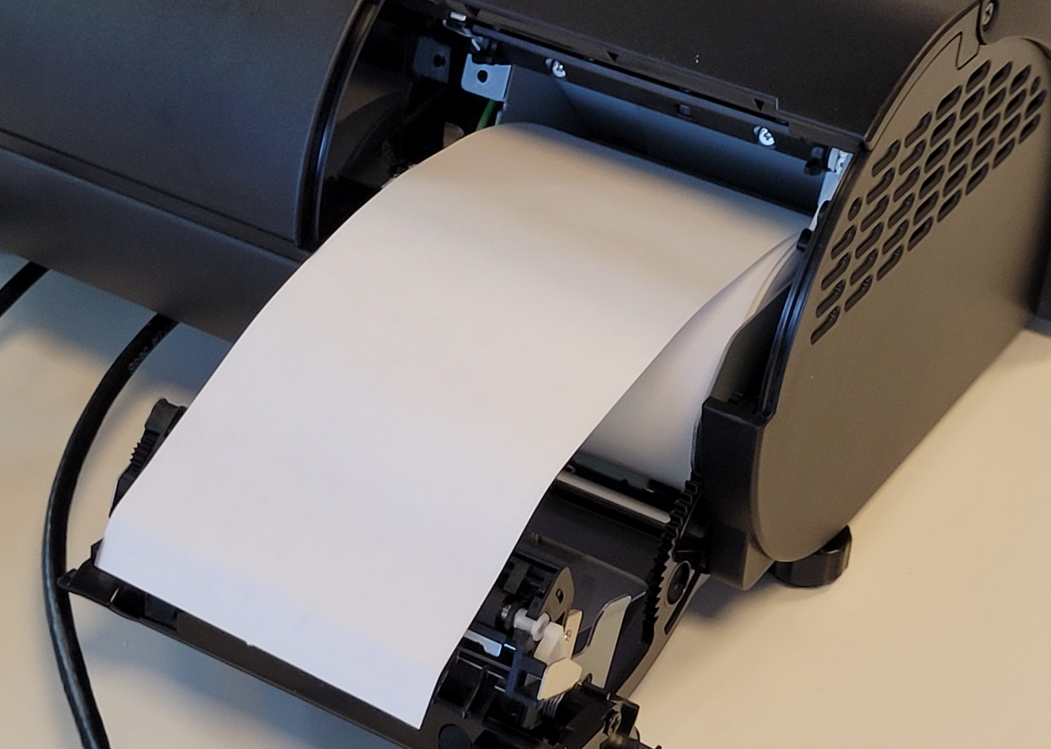
- Check that the paper is facing in the right direction:
-
- Close the lid, you should hear a click when it is fully closed.
To test the printer functionality:
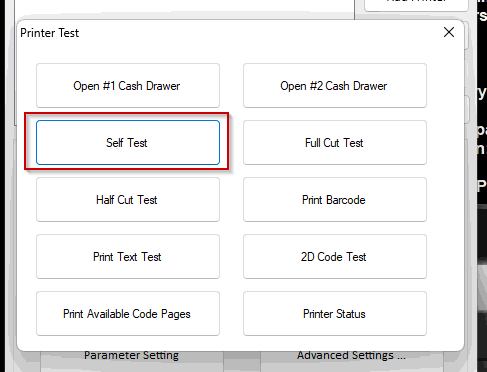
- Start the ProtechUtility software on the desktop and select Printer Test:

- Select Self Test and the printer should print out a test page:
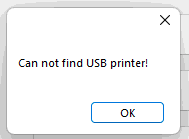
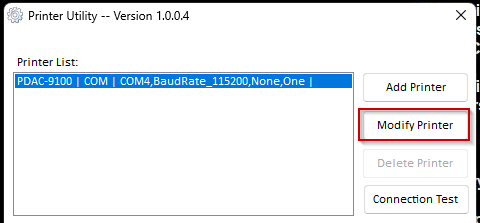
- In case you get the following or similar error:
-
- Select Modify Printer
-
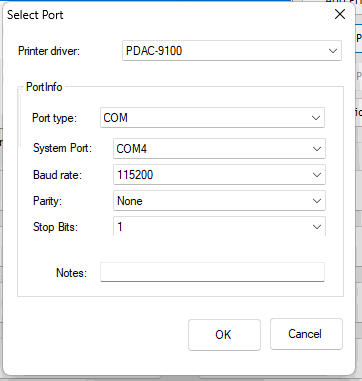
- Make sure it's set to Port type = COM, System Port = COM4, Baudrate = 115200 and confirm with OK:
- Try to print the test print again, if it still fails, the printer is malfunctioning.
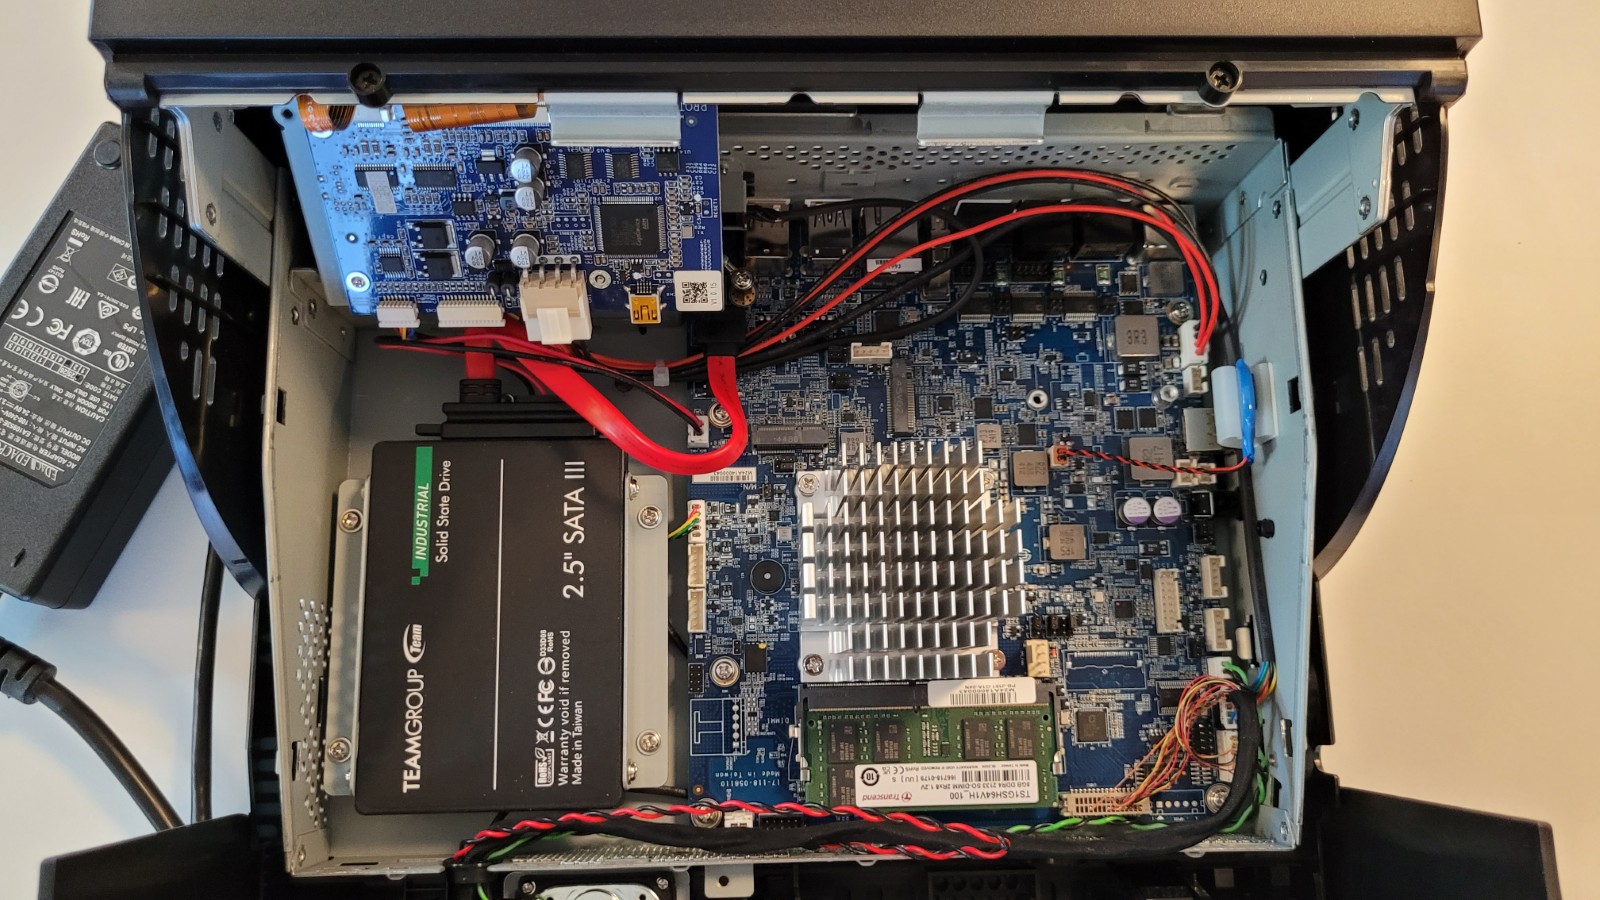
Accessing the device internals
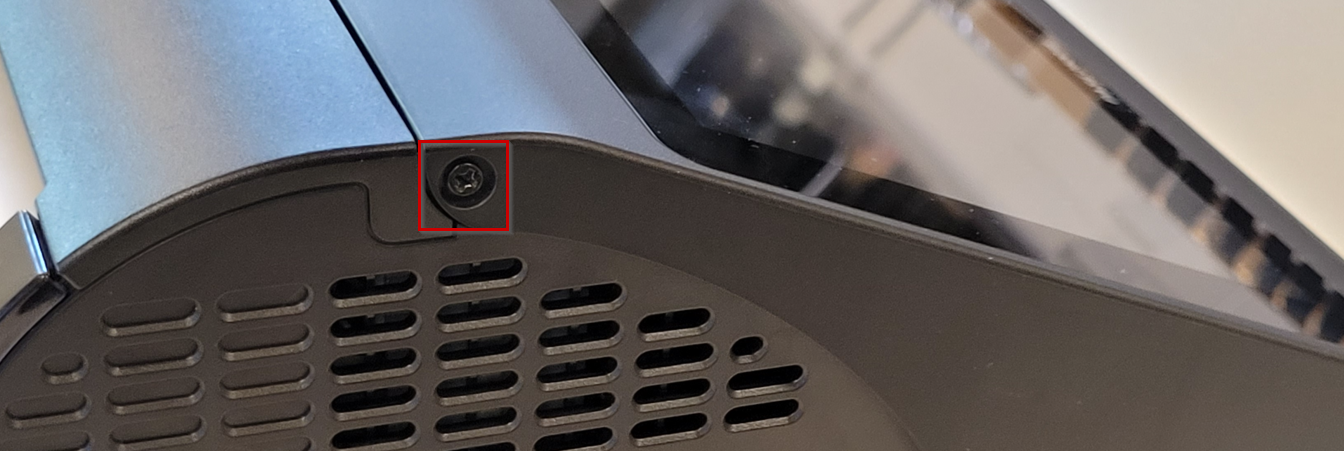
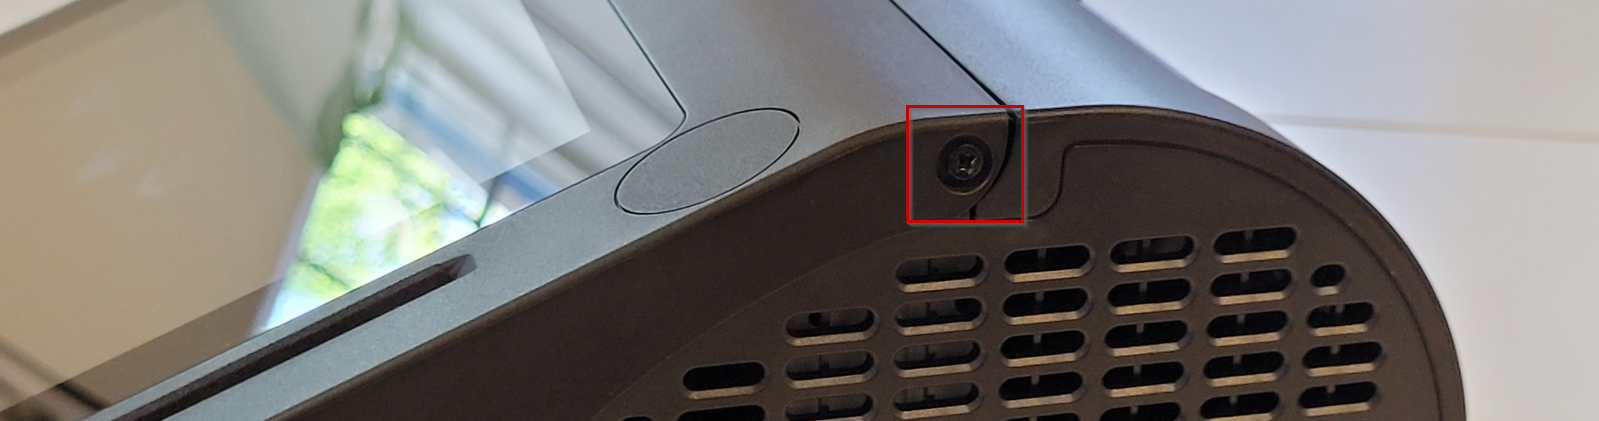
- First, unplug the device from the power outlet, and then unscrew the two phillips screws on each side of the POS device:
- The screen can now fold outwards to display the internals:
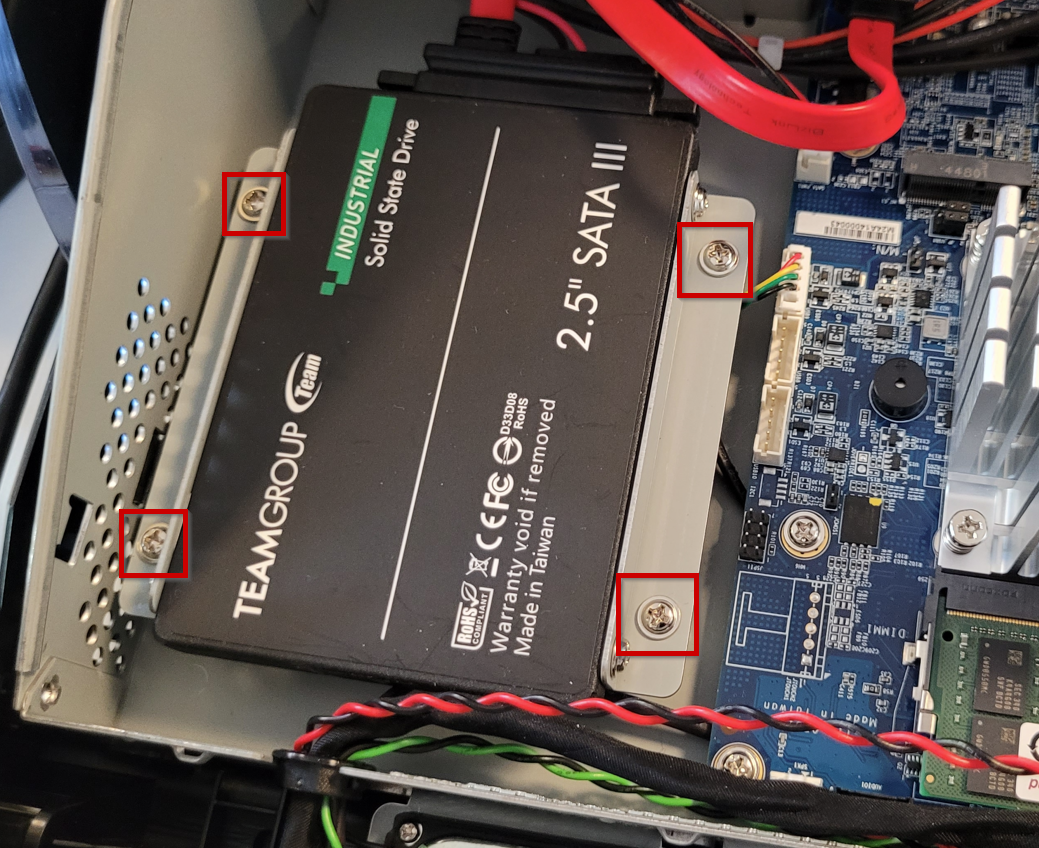
Replacing the disk
- To replace the disk, unscrew the four phillips screws holding the L profile on the motherboard:
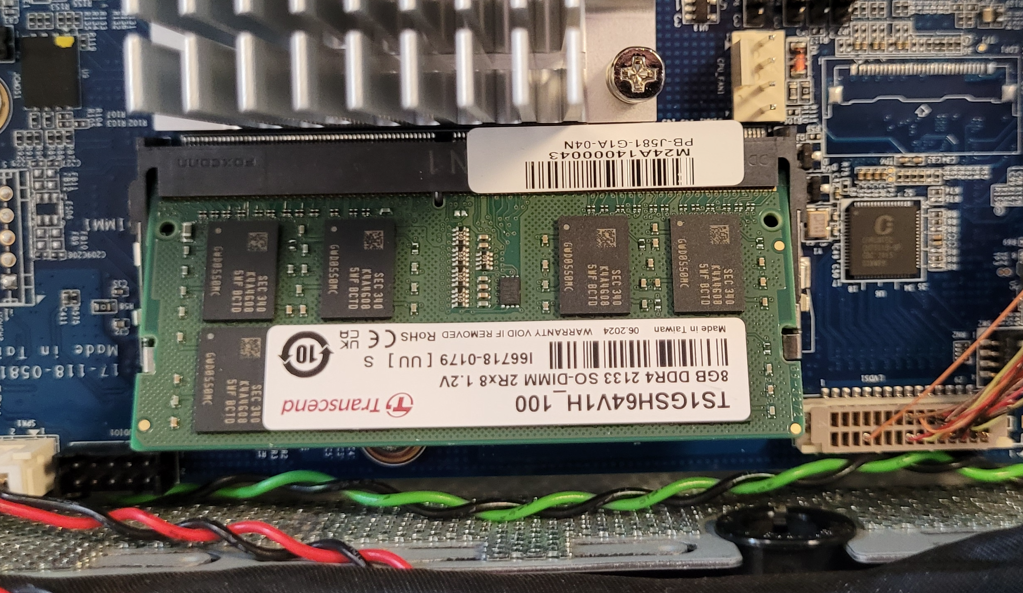
Replacing RAM
- To replace RAM, gently spread the arms holding the RAM board in place outwards:
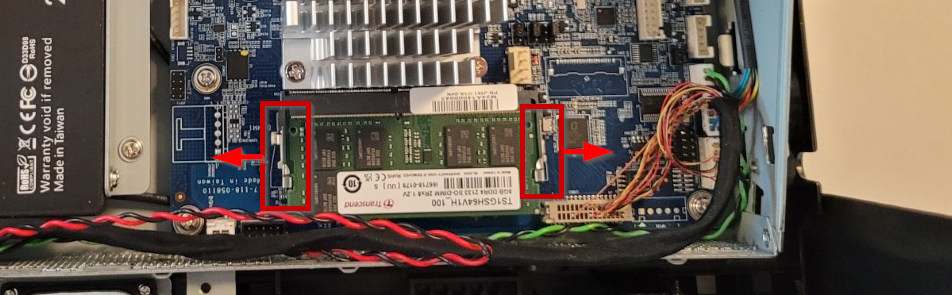
- The board will pop out and you can remove it by gently pulling it outwards:
- Insert the new board in the same way and gently push it downwards until the arms are engaged and it sits securely.
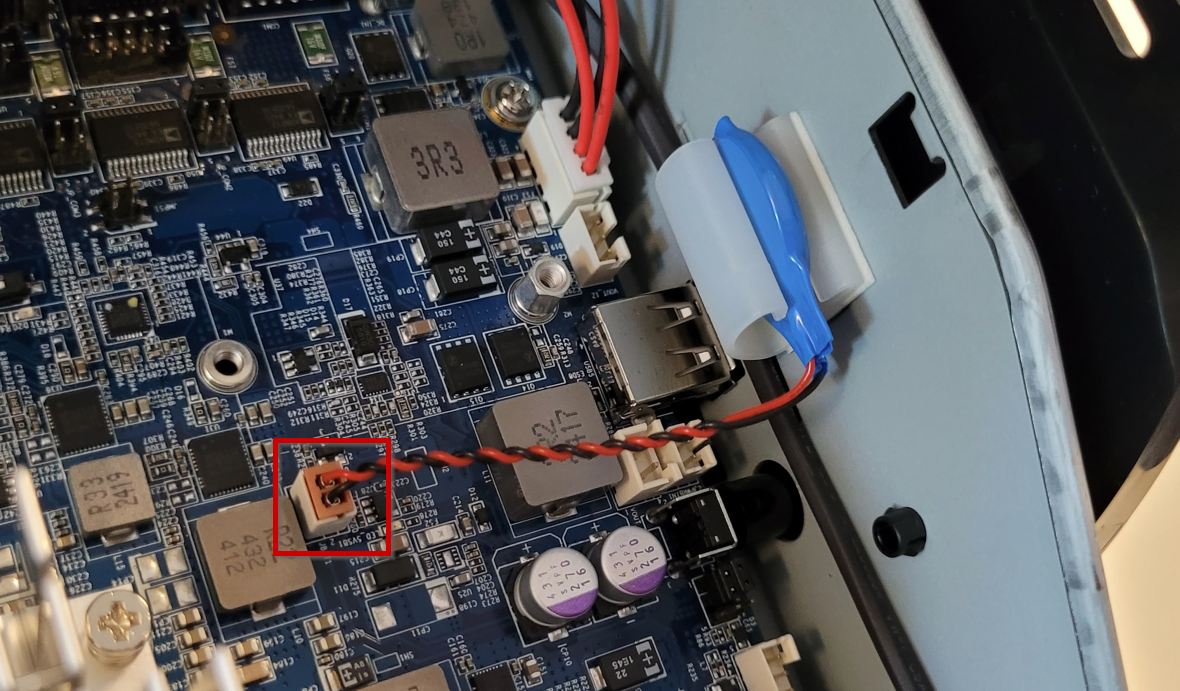
Replacing/disconnecting the BIOS battery
- To replace the BIOS battery, gently unplug it from the motherboard:
Resetting BIOS settings
- Connect a keyboard to the device
- Restart the device and press DEL when the first screen appears.
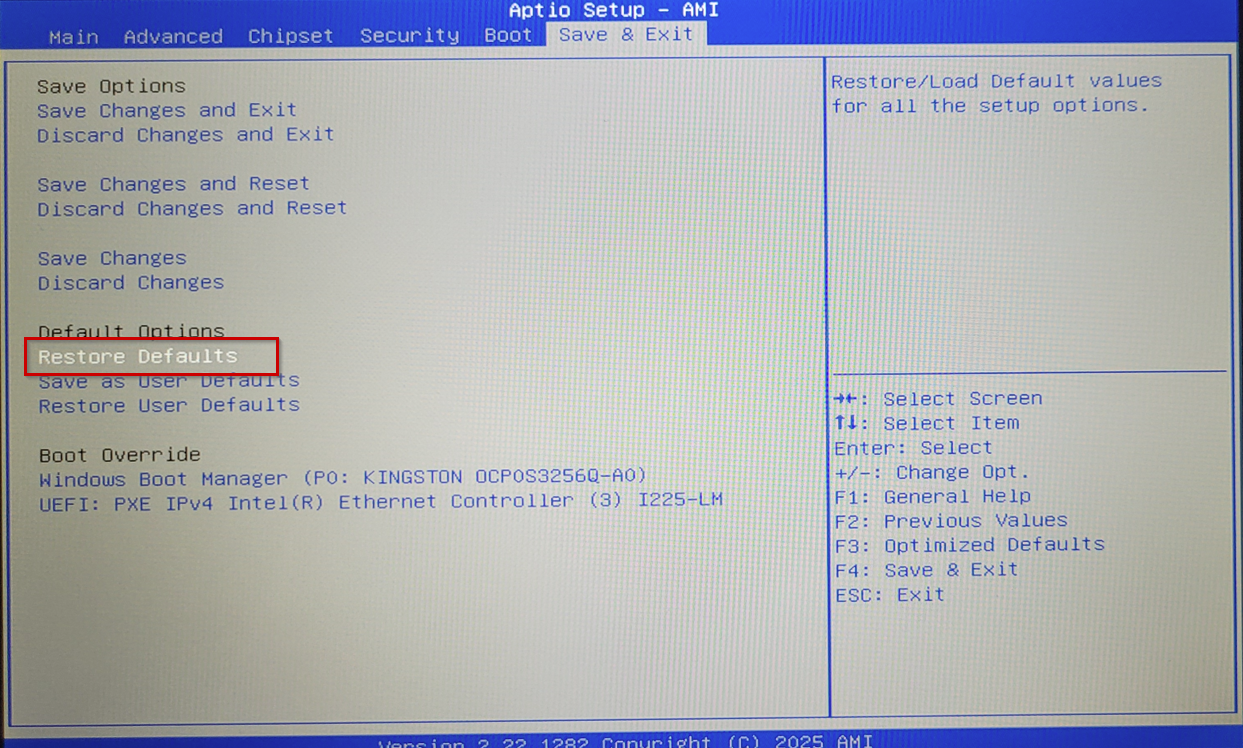
- Use the arrow keys to navigate right to Save & Exit tab and:
- Select Restore Defaults to reset BIOS settings
- Select Save Changes and Reset to apply the changes.
Was this article helpful?
That’s Great!
Thank you for your feedback
Sorry! We couldn't be helpful
Thank you for your feedback
Feedback sent
We appreciate your effort and will try to fix the article